- A Lease Abstract Template
- A Financial Model (Speadsheet)
- A Reporting Template
The Template System
Each Agent has three components:- Input: Where the Agent will look for source documents
- Prompts: The instructions which the Agent will execute on the source documents
- Output: Where Agent will put the results of its Prompts
Setting Up A Template
Starting your from Agent’s main page, click “Add Output Template” in the “Output” box.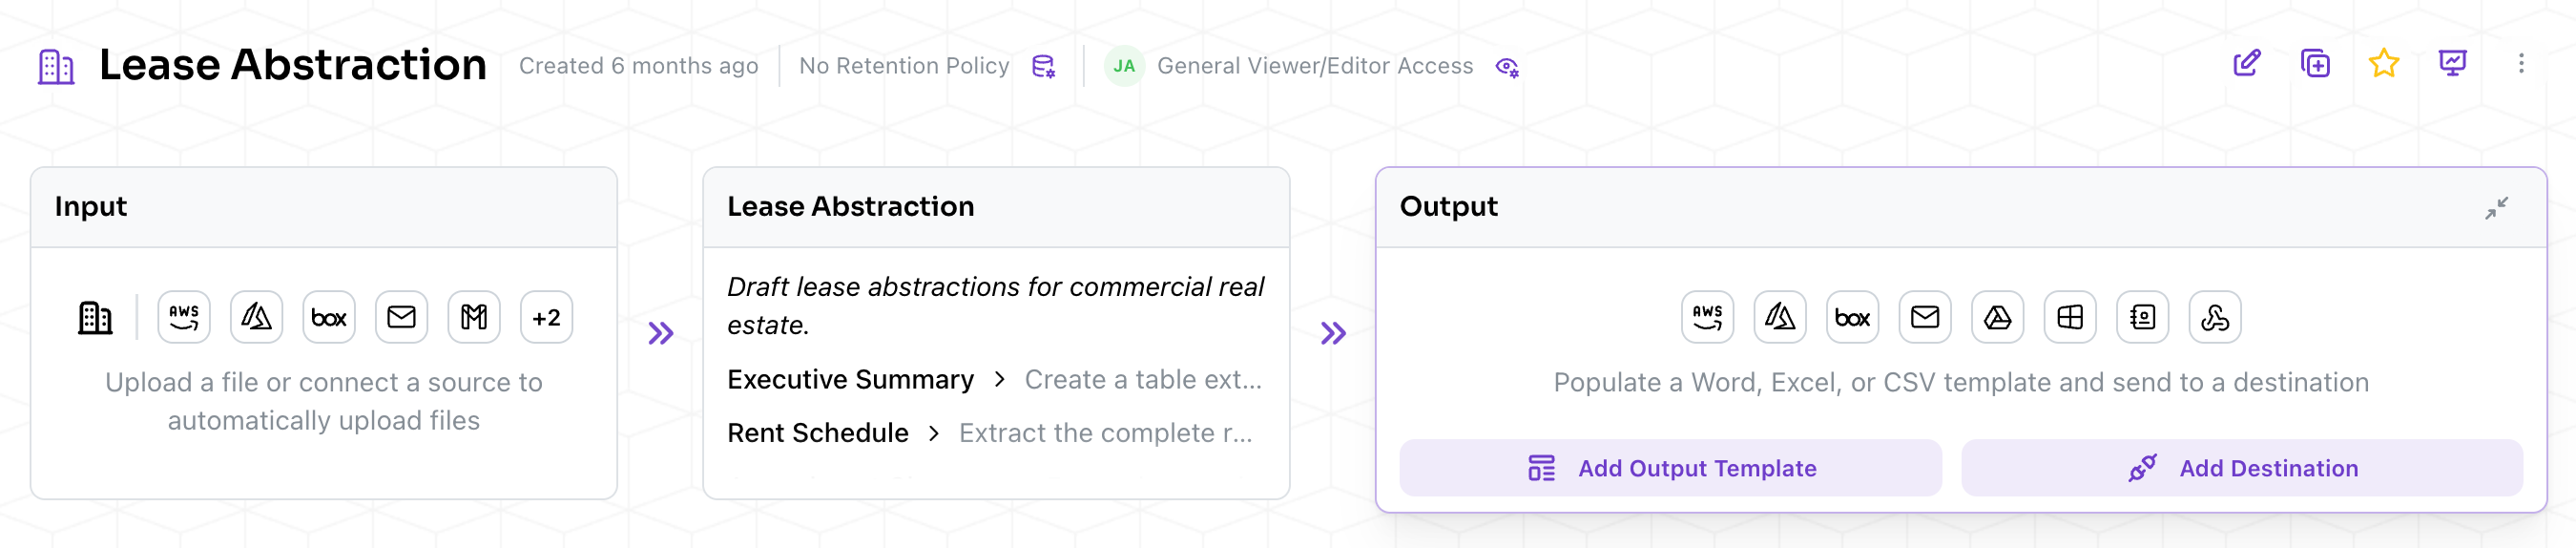
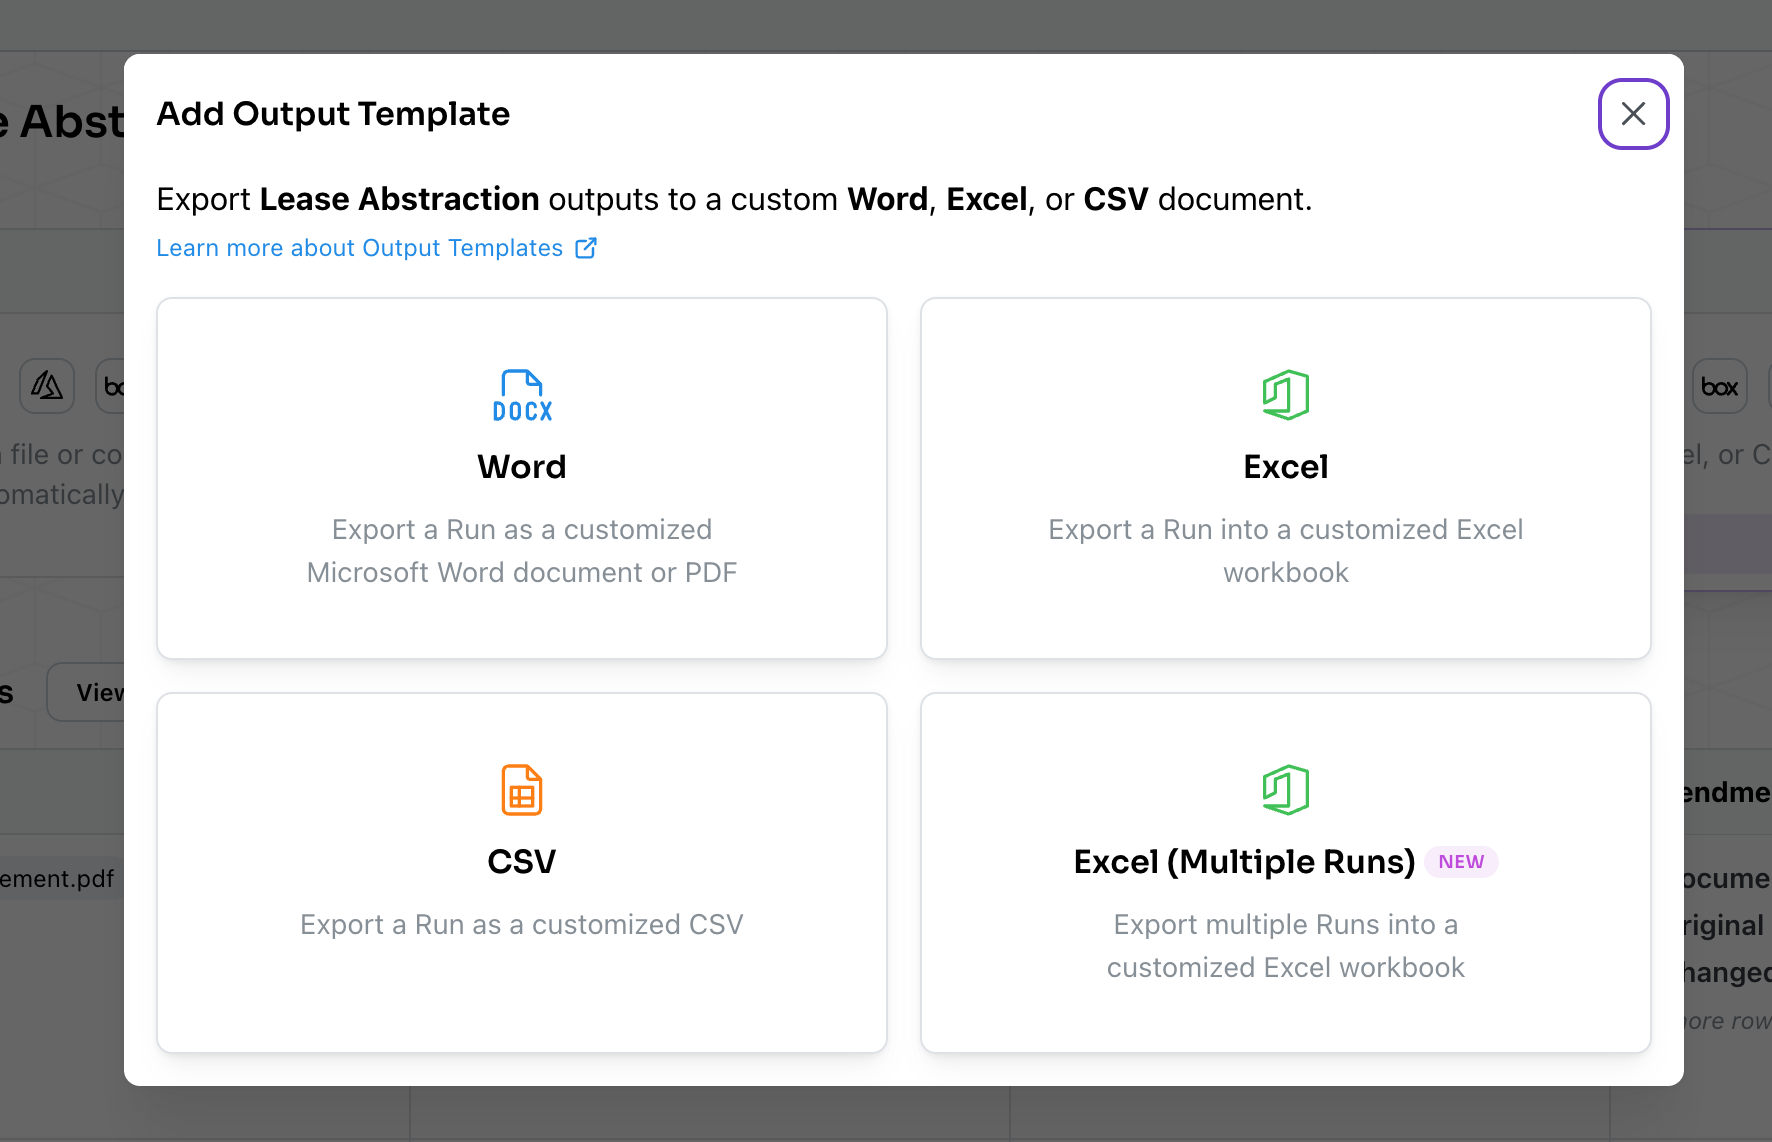
- Word
- CSV
- Excel
- Excel Multple Runs
Editing Your Template
If you are using Excel or Word for desktop on either PC or Mac, Kolena provides Add-ins for editing your templates: Otherwise, open your template document in a seperate window using Word, Excel, or some other document editor. Copy and paste the appropriate placeholders into your template document. If necessary, define new Prompts to populate your template. Each new prompt will have an associated placeholder.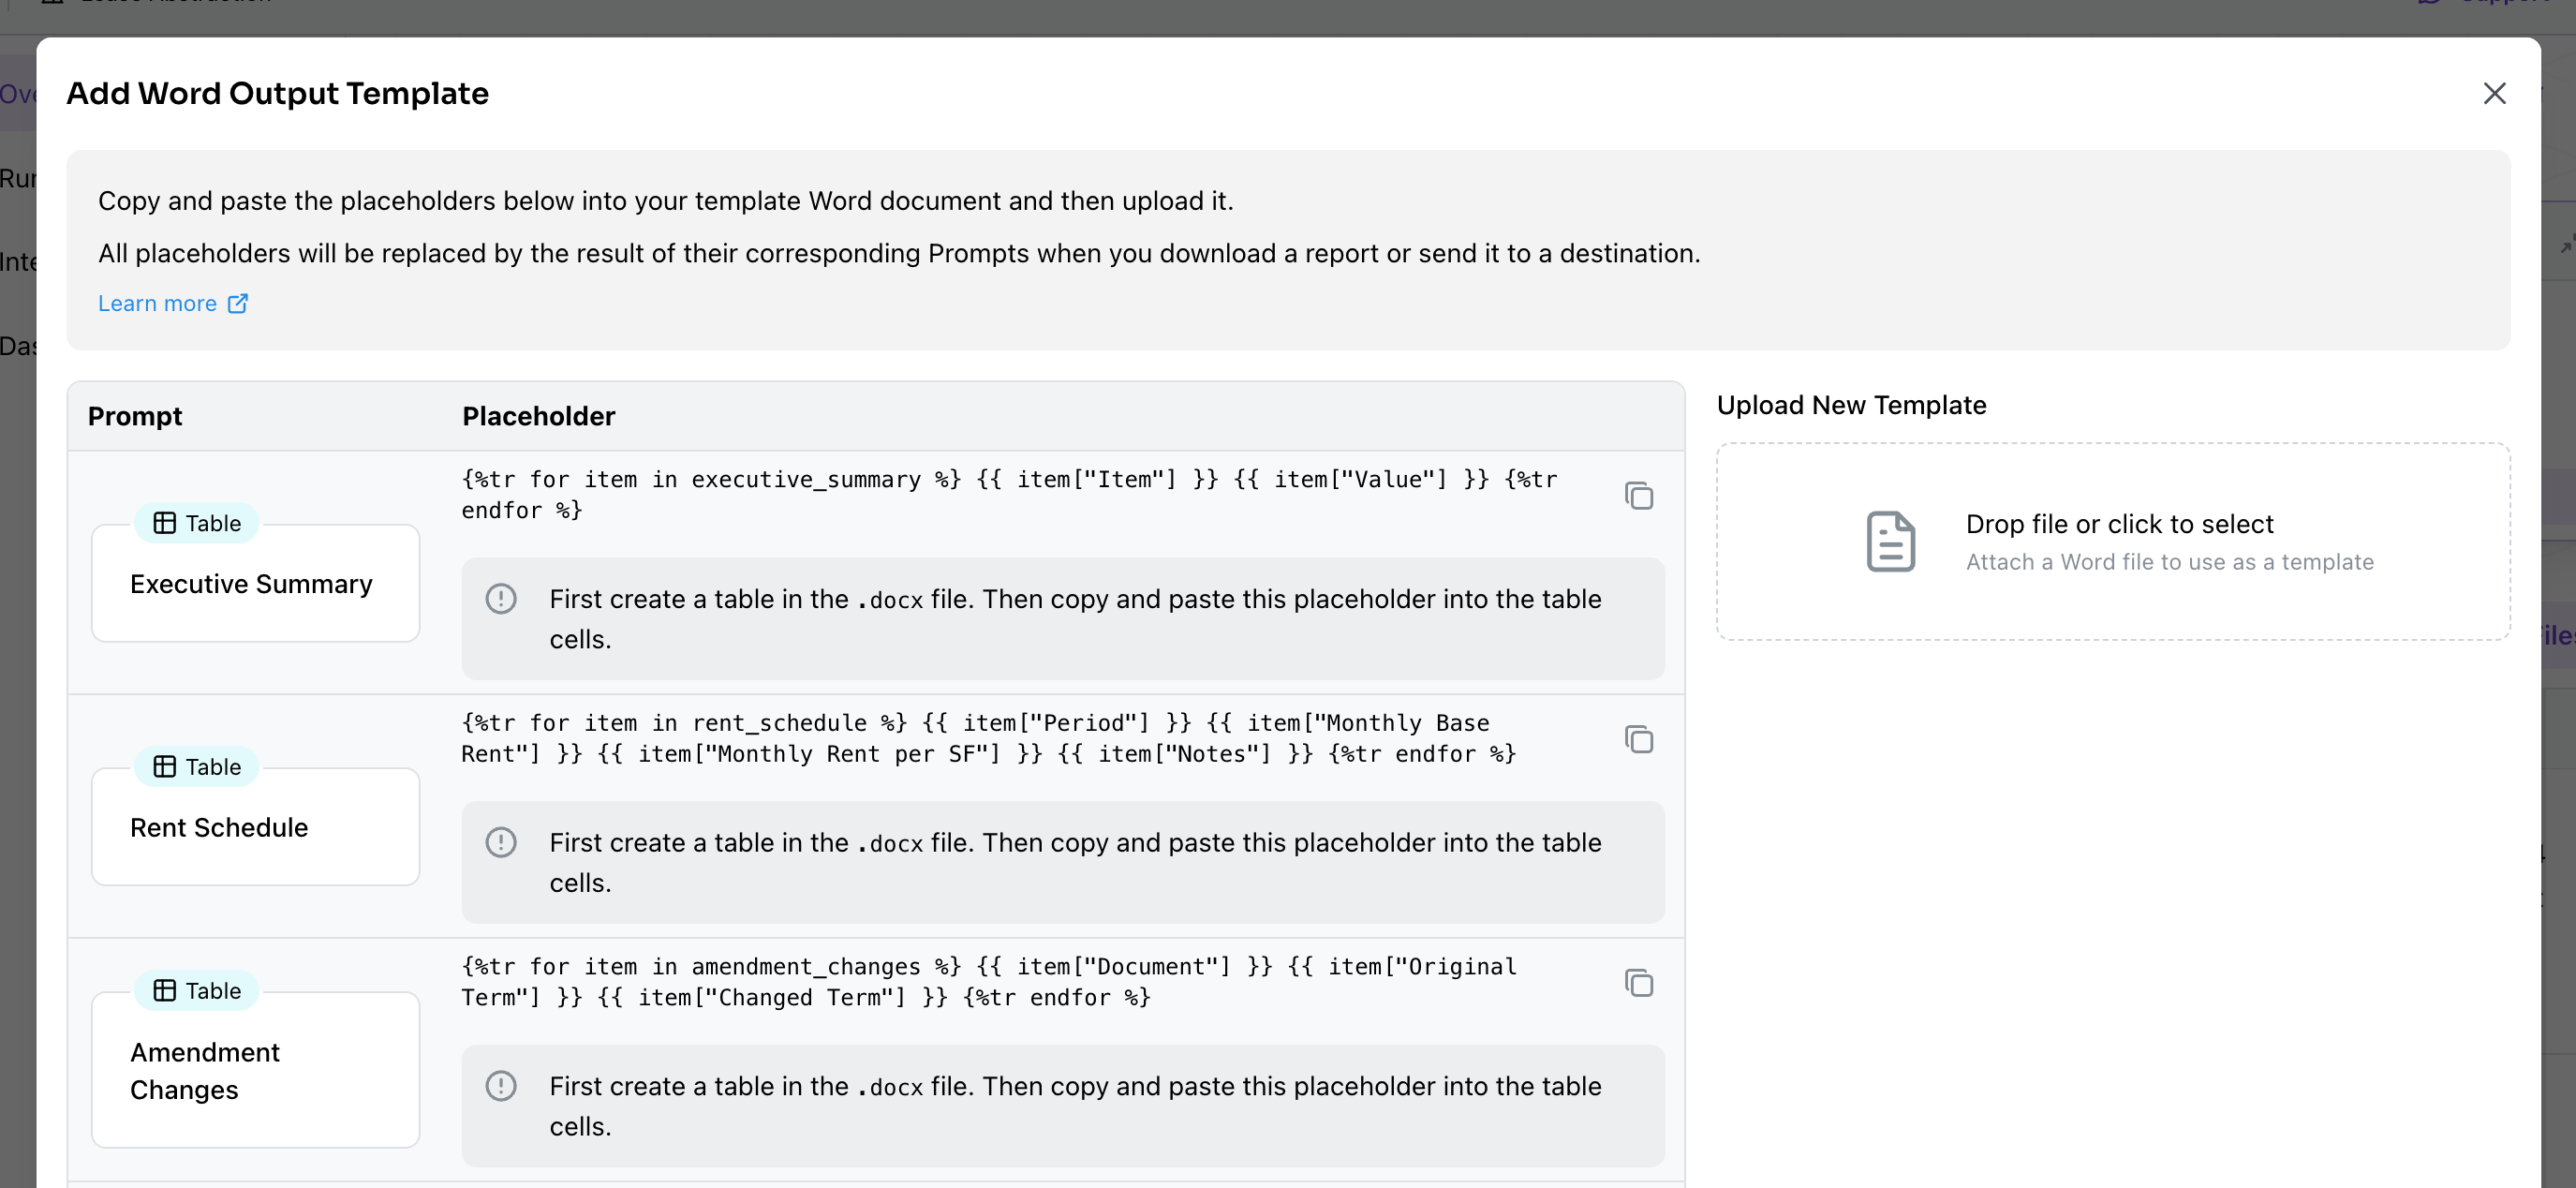
Kolena will preserve the font and format of the placeholders in Word and Excel documents.
For example, if your placeholder in a Word document is
【Company Name】 in bolded, size 24, Times New Roman and your Agent Run has Company Name extracted as Kolena Inc, the placeholder will be replaced with Kolena Inc, also in bolded, size 24, Times New Roman.All elements in the template files that are not in placeholders (e.g. text, images, and borders) will be preserved.Uploading the Template
Once you have inserted the appropriate placeholders into your document, save it and upload it in the “Set Output Template” modal. When uploading, Kolena will indicate which placeholders are detected in the document. Click “Submit” to save the template to the Agent.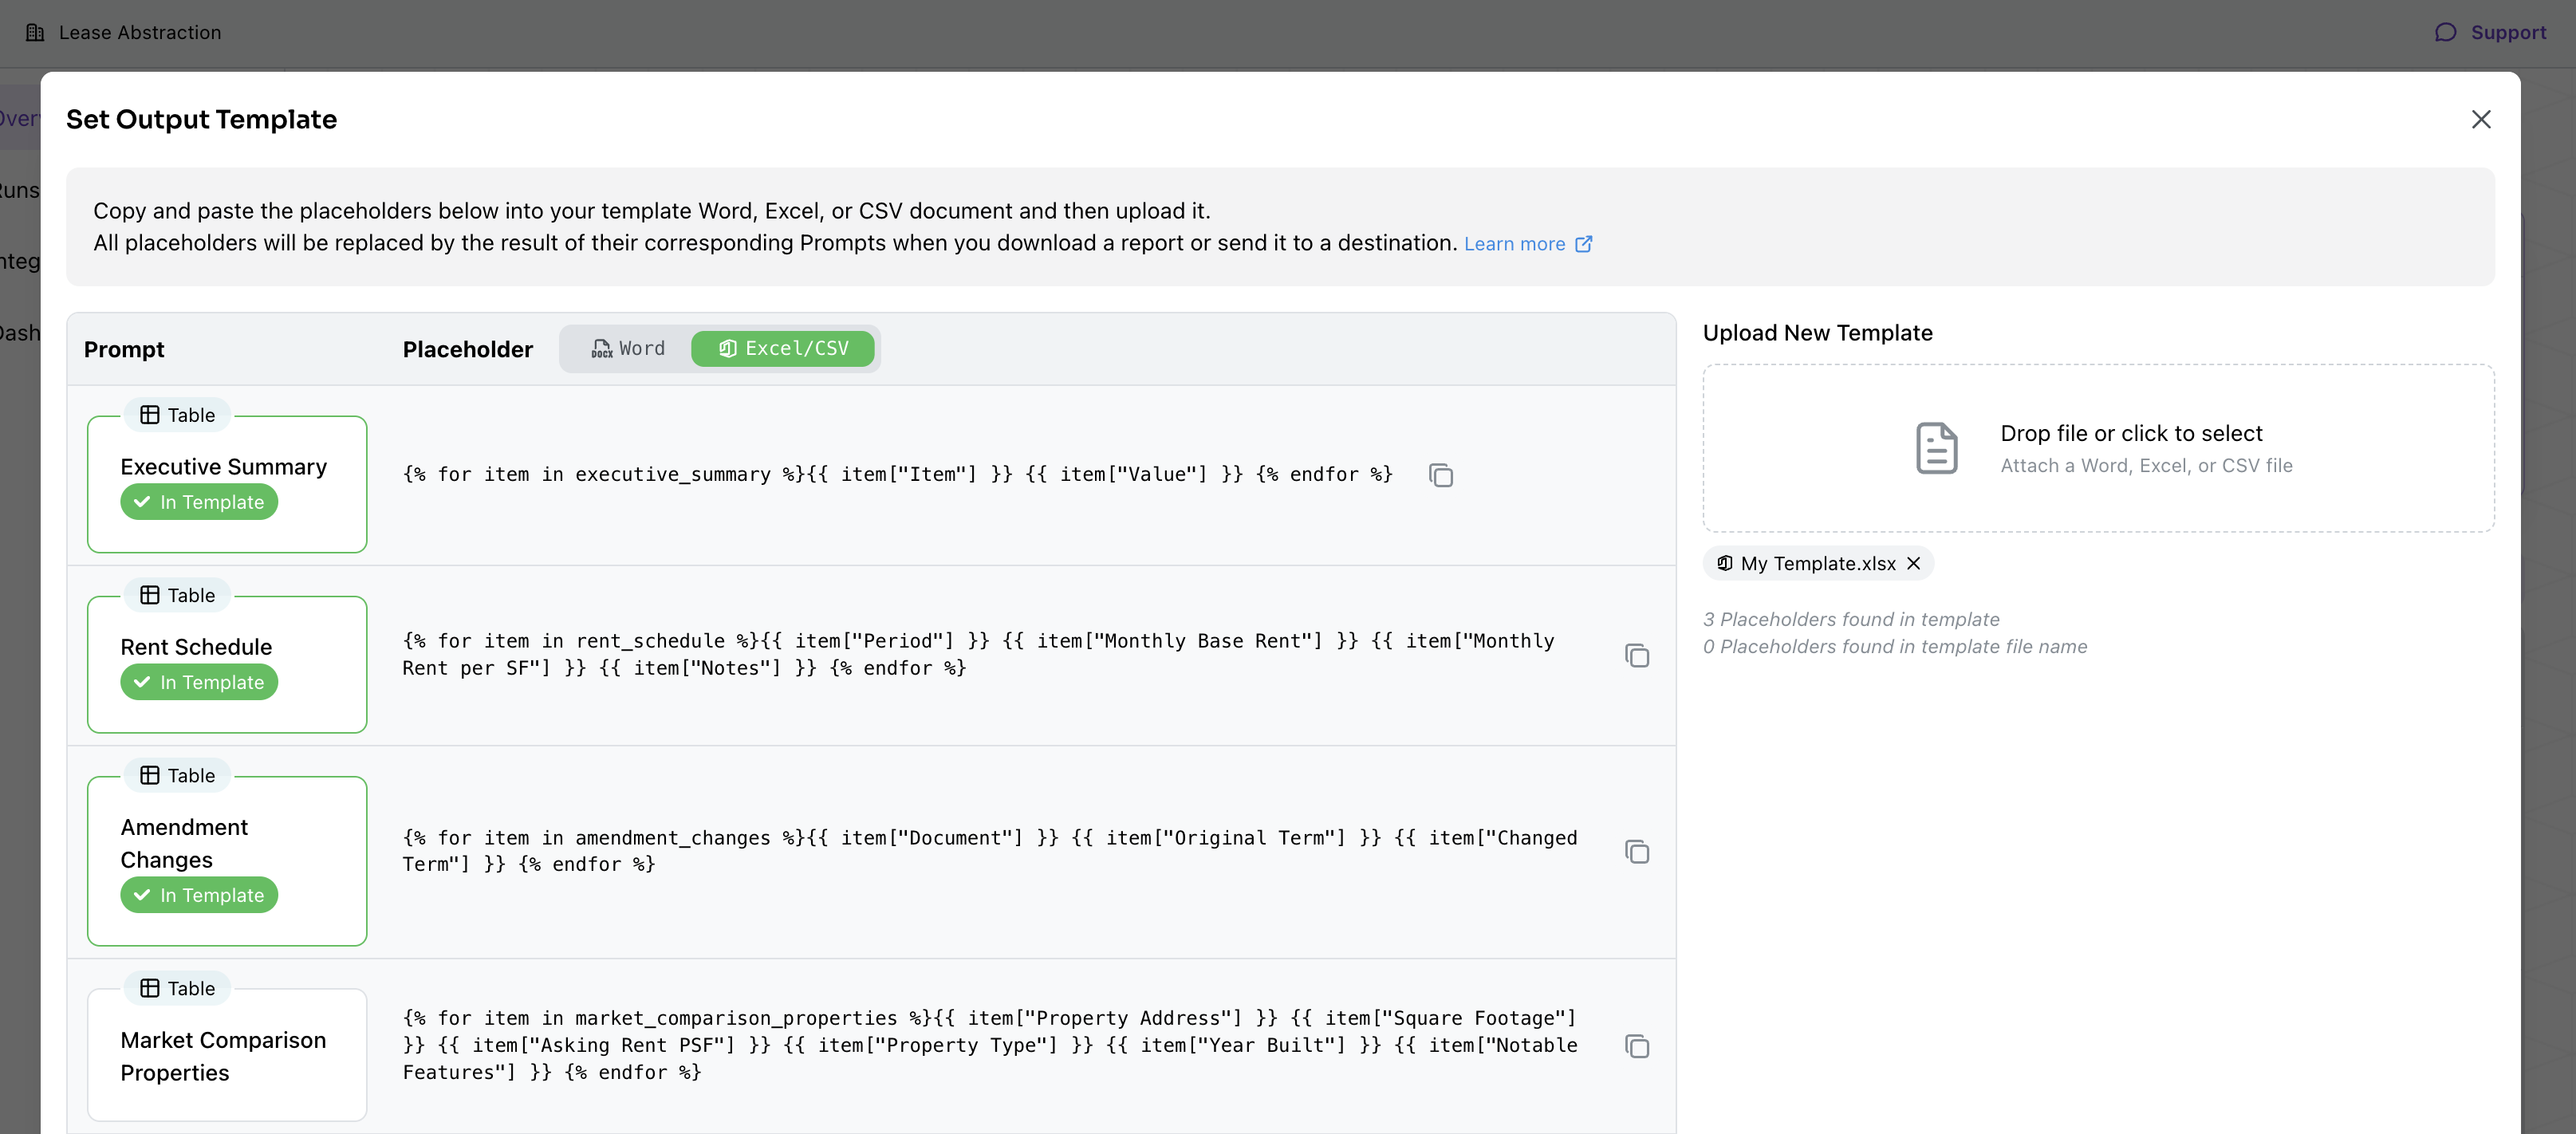
Templating the Output File Name
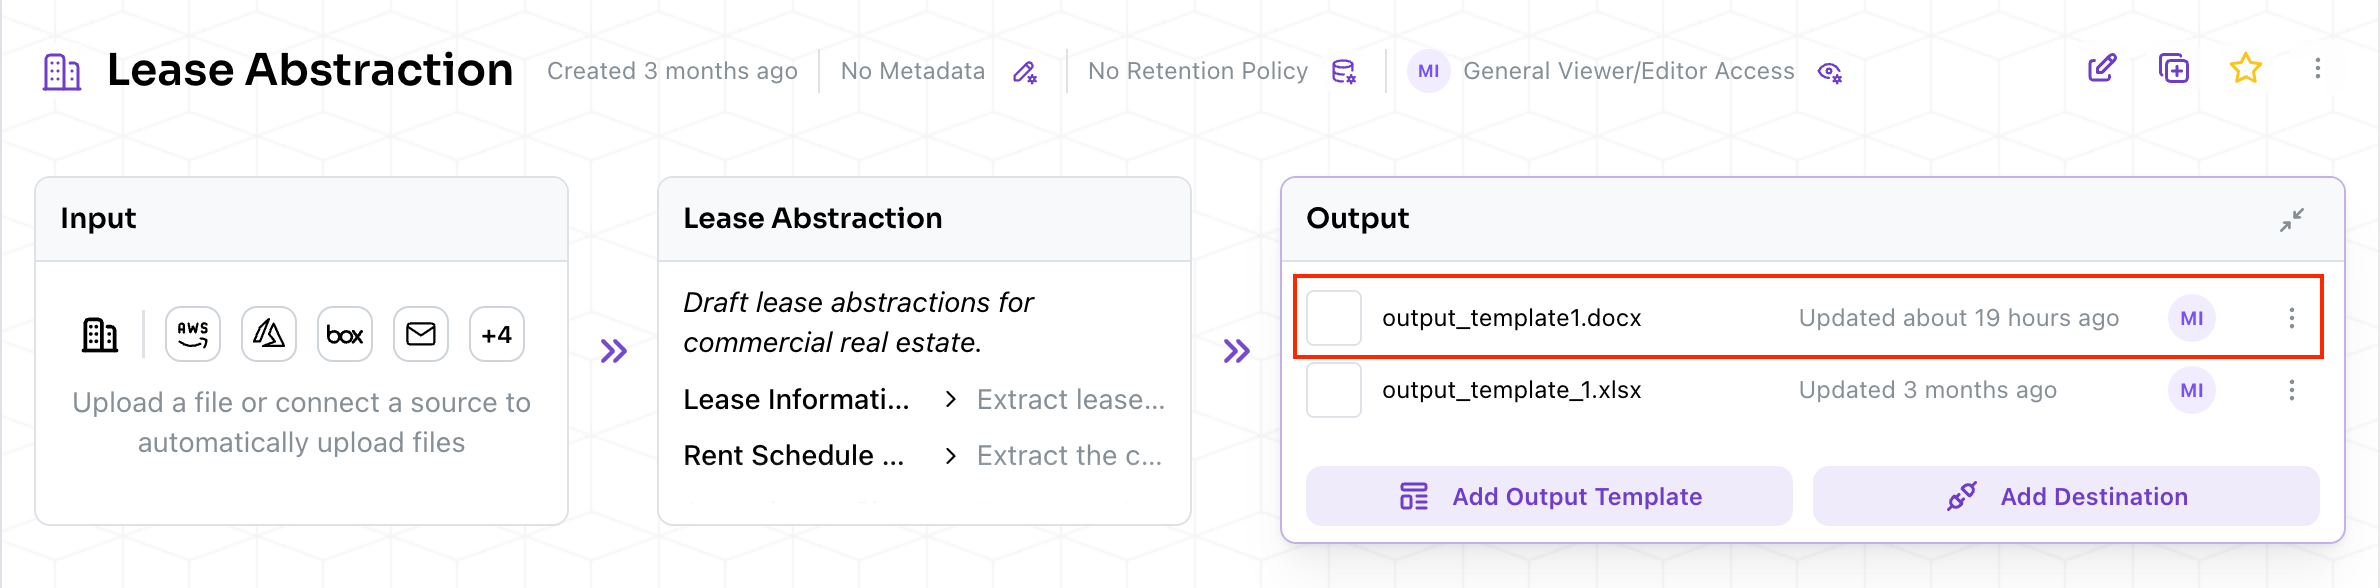
Placeholders can also be used to populate the output file name. After uploading your template file, you can insert placeholders into the output filename in the “Manage Template” modal:- From the Agent homepage, click on the template in the “Output” section:
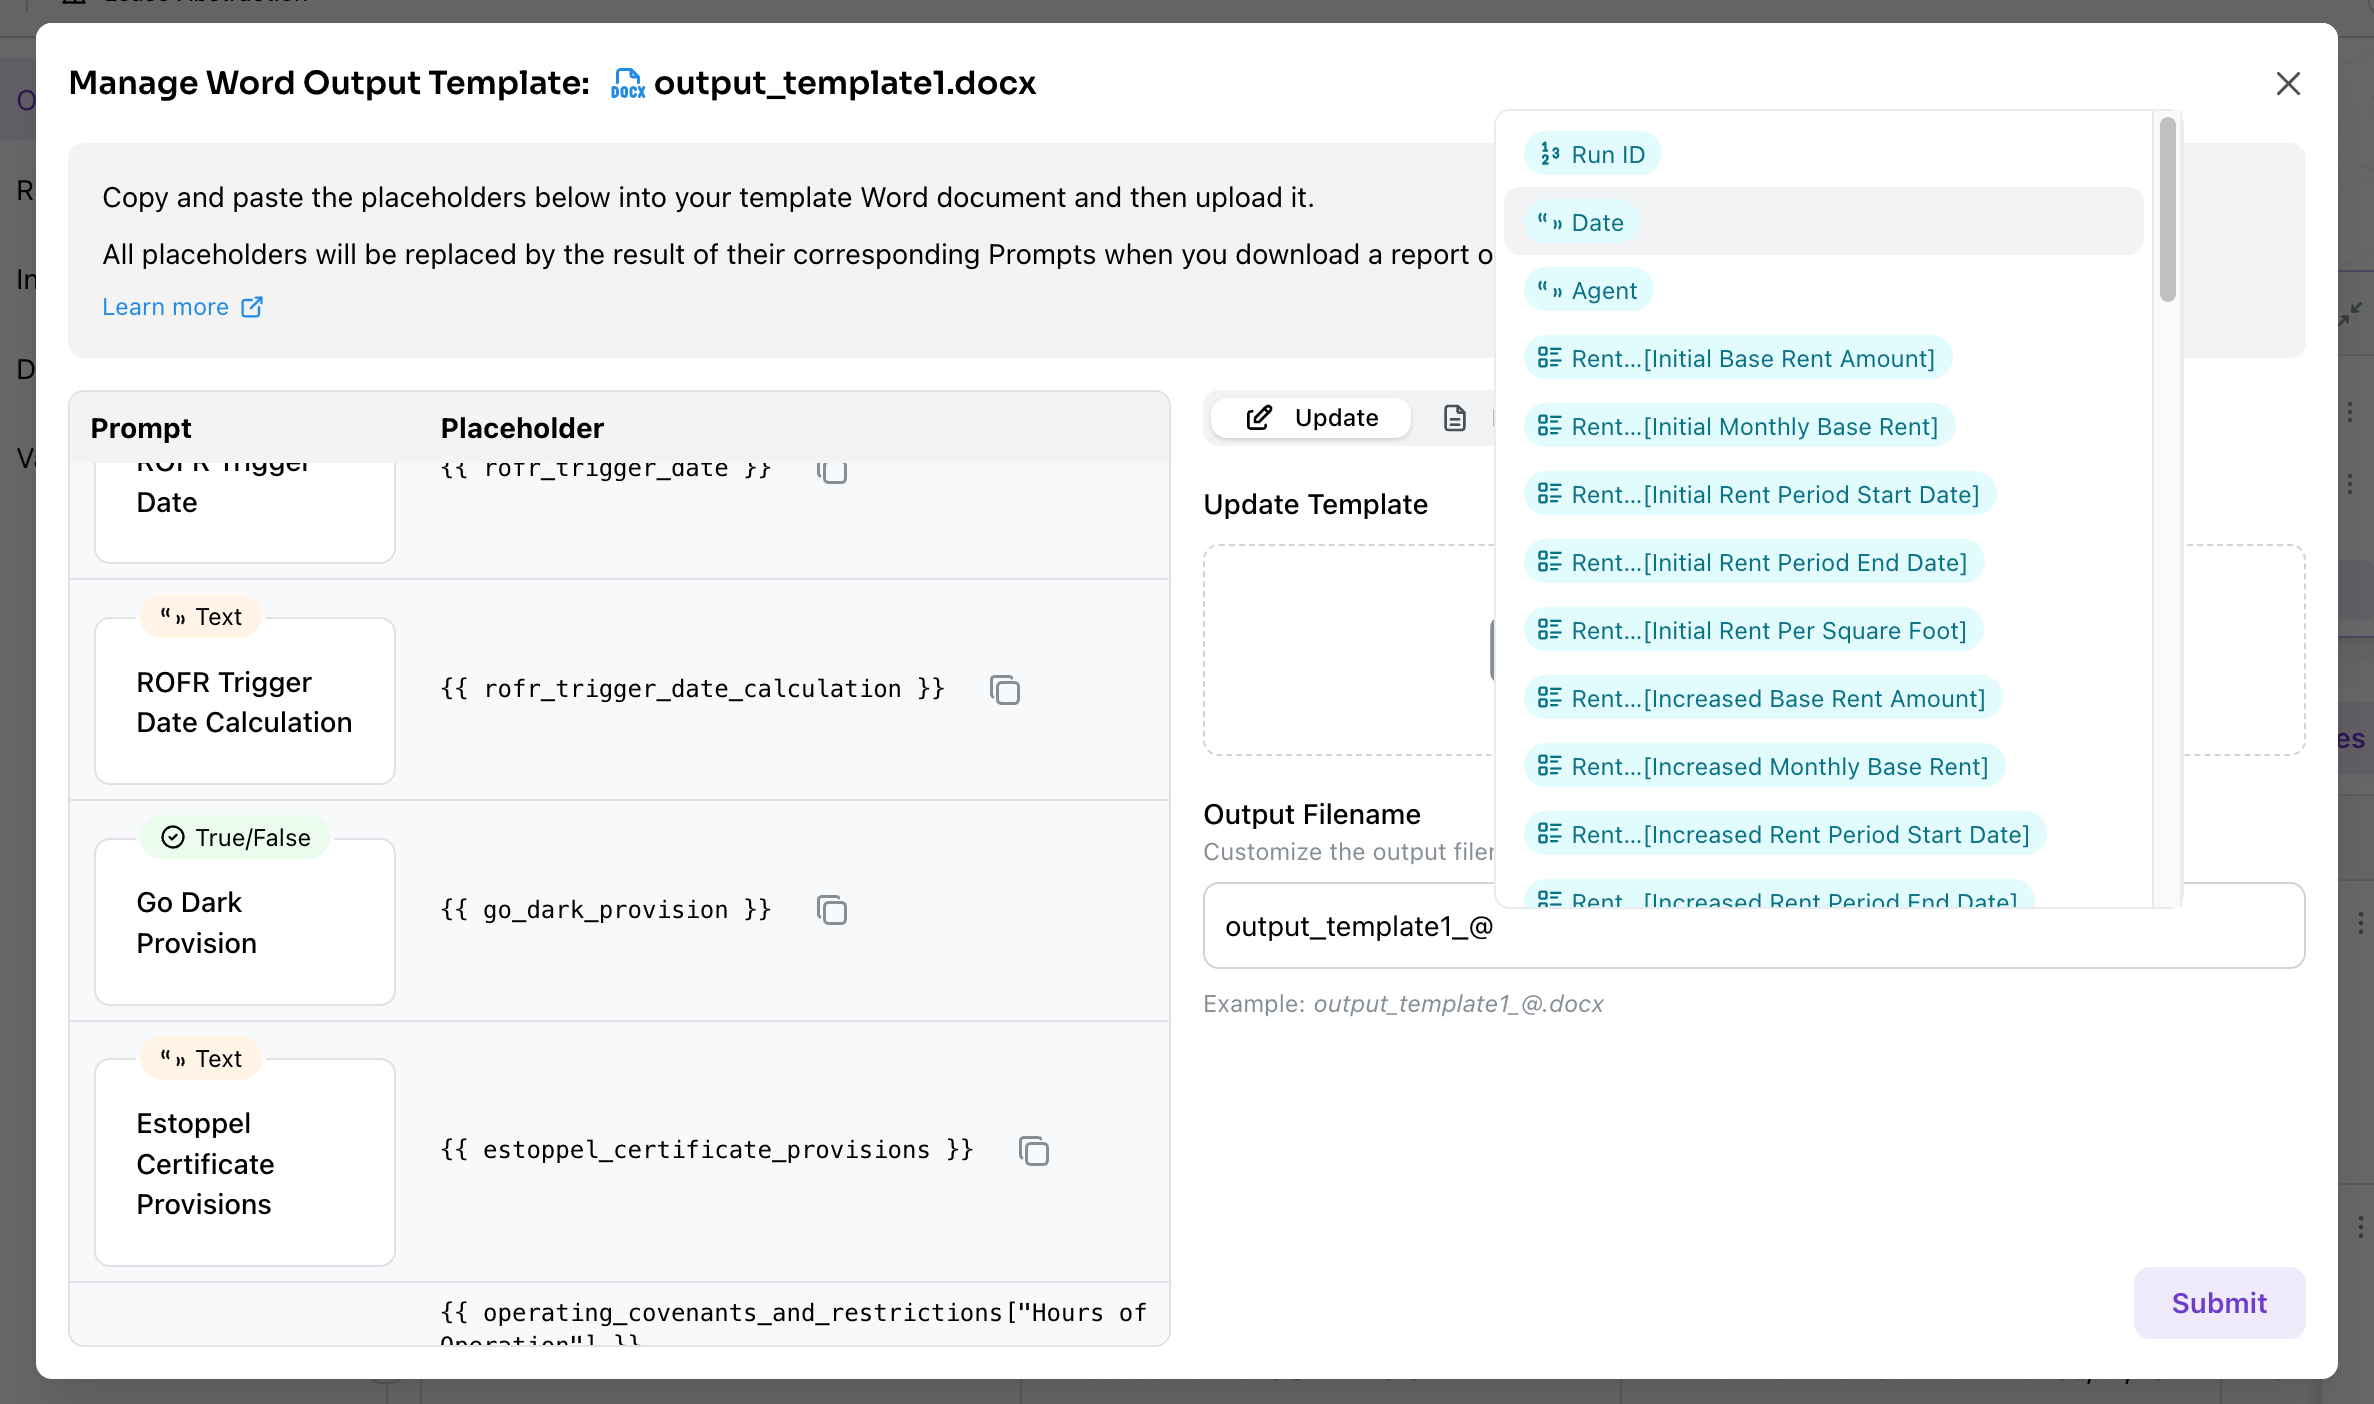
- The “Manage Template” modal will open. Click in the “Output Filename” input, and type a
@to bring up a list of placeholders. Click on the desired placeholder to insert it into the filename.
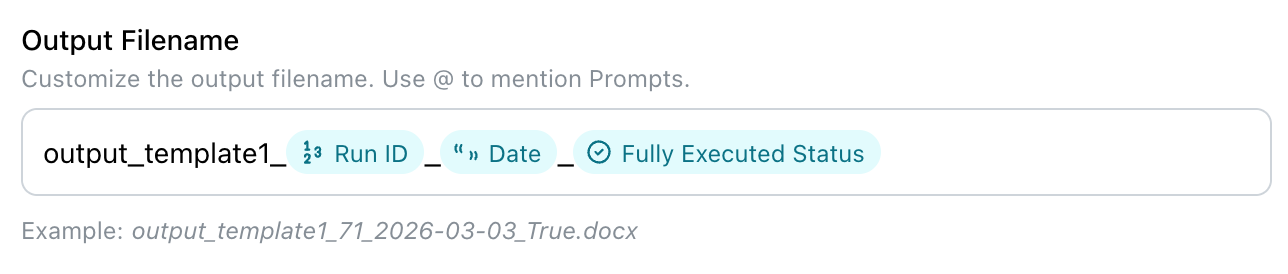
- As you insert placeholders, the application will show a preview of what the output filename would look like for your latest run.
Using the Template
Once you’ve uploaded a template to the Agent, you can use it for direct downloads and for automated Integrations to Destinations.Downloading the Output
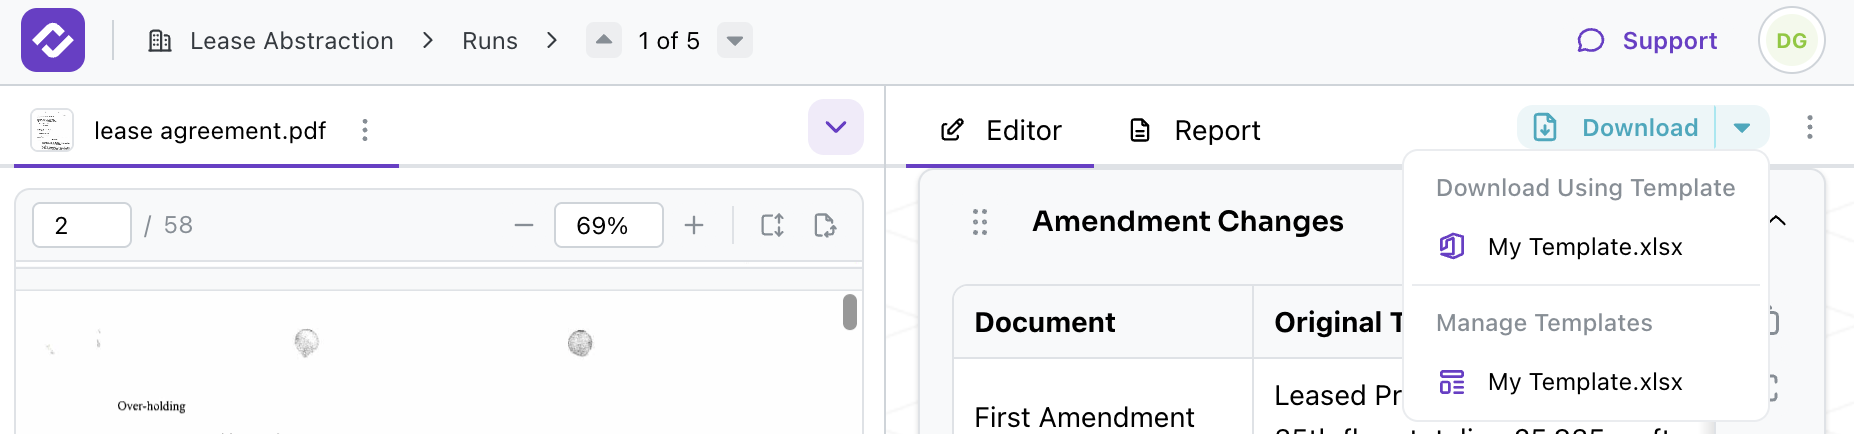
You can directly download the Templated Output for a given Agent Run:- Navigate to the desired Agent Run
- Click into the “Report” tab
- Click on the (Download) icon
- Select your desired template and format from the download menu
docx / xlsx, or a generated pdf.
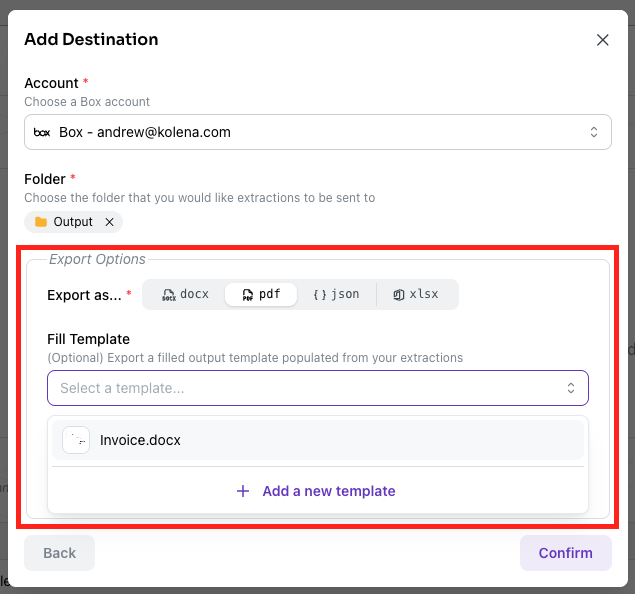
Configuring a Destination
You can also specify a template for export with a Destination:- From the Agent’s main page, click on “Add Destination” in the “Output” box, or edit an existing Destination
- Under the “Export Options” section for the Destination, select your desired Ouput Template as the “Fill Template”.